Dynmap – How to Install and Configure
Dynmap is a popular plugin that allows you to view the Minecraft server world in your web browser—similar to Google Maps, but for your own server.
Dynmap works on Spigot, Paper, Purpur servers as well as Forge/Fabric (as a mod). Make sure to download the correct version for your platform.
Prerequisites
Before you begin, ensure you have:
- A running Minecraft server (Spigot/Paper/Purpur or Forge/Fabric)
- The ability to add an additional network port
- Minimum recommended: 2GB RAM for a basic map, 4GB+ for high-resolution maps
Dynmap can consume significant server resources, particularly during full map rendering. High-resolution maps may require many gigabytes of disk space.
Plugin Installation
Downloading the Plugin
Download the latest Dynmap plugin from CurseForge or SpigotMC.
Check your Minecraft server version and download the corresponding plugin version. Using an incompatible version may cause errors.
Uploading the File to the Server
- Go to the Files tab in your server management panel.
- Open the plugins folder in the server's root directory.
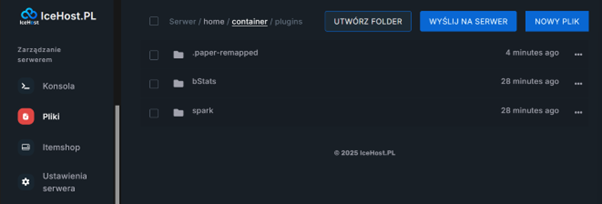
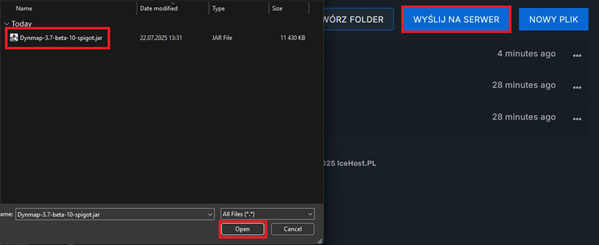
- Click "Upload to server" and upload the downloaded file
Dynmap-(Version).jar.
First Launch
- Start the Minecraft server (or restart it if it's already running).
- The plugin will automatically create a Dynmap folder and configuration files.
- After the first launch, stop the server.
Dynmap Port Configuration
Dynmap requires a dedicated network port to display the map in the browser.
Adding a New Port
- Go to the Network tab in your server panel.
- Add a new port, select Dynmap Port, and then Create new port.
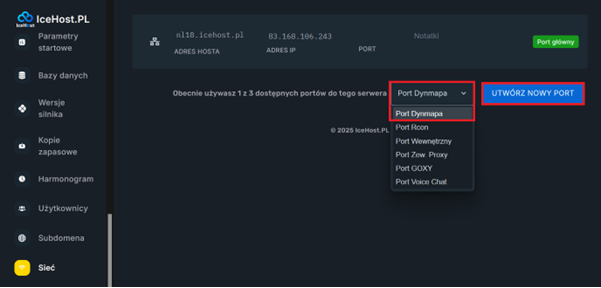
- Copy the assigned port number—you'll need it for the next step.

Dynmap Plugin Configuration
Editing the Configuration File
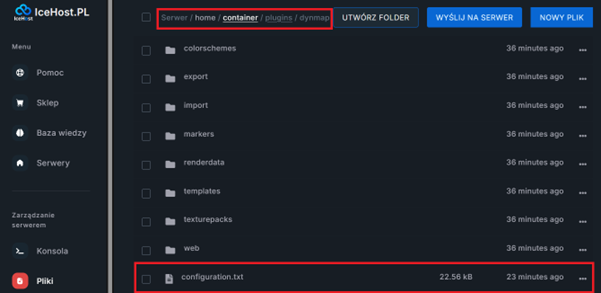
- Return to the Files tab.
- Go to the
pluginsfolder, then thedynmapfolder. - Locate the configuration.txt file and open it.
Key Settings
1. Webserver Port
Find the line with the webserver-port: parameter (usually around line 300–400 depending on the version) and set it to the previously assigned port:
webserver-port: 21000
2. Map Resolution
Set the deftemplatesuffix: parameter at the beginning of the file:
deftemplatesuffix: vlowres
Available options:
vlowres— very low resolution (recommended for minimal resource usage)lowres— low resolution (good compromise between quality and performance)medres— medium resolution (requires more resources)hires— high resolution (very resource-intensive, can take up hundreds of GB)
For most servers, it is recommended to use vlowres or lowres. You can later increase the resolution if server resources allow.
3. Image Format (Optional)
To save disk space, find the image-format: parameter and set it to:
image-format: jpg
You may also use the webp format for even better compression:
image-format: webp-q90
4. Saving Changes
After making all changes:
- Save the
configuration.txtfile. - Restart the server from the Console tab.
Testing Dynmap
Accessing the Map
After starting the server, open your browser and enter:
http://SERVER_IP:DYNMAP_PORT
Example:
http://83.168.106.243:21000
Replace SERVER_IP with your server's IP address and DYNMAP_PORT with the port configured in configuration.txt.
If you see the Dynmap page, everything is working correctly!
Useful Commands
Render Management
/dynmap fullrender— starts full rendering of all maps/dynmap fullrender <world>— renders a specific world/dynmap cancelrender <world>— cancels active rendering/dynmap pause all— pauses all rendering/dynmap pause none— resumes rendering
Plugin Management
/dynmap reload— reloads plugin settings without restarting the server/dynmap refresh— refreshes the map/dynmap purgequeue— clears the tile update queue
Player Visibility
/dynmap hide— hides the player on the map/dynmap show— shows the player on the map/dynmap hide <nickname>— hides a specific player (requires permissions)