Voice Chat – How to Install and Configure
Voice Chat is a solution that enables voice communication directly in Minecraft without the need for external programs such as Discord or TeamSpeak. The most popular plugins are Simple Voice Chat and Plasmo Voice, which offer proximity chat functionality — the closer you are to other players, the clearer you hear them.
Both plugins work on Spigot, Paper, Purpur servers and as mods on Forge, Fabric, NeoForge, and Quilt. Make sure to download the correct version for your platform.
Prerequisites
Before you begin, ensure you have:
- A running Minecraft server (Spigot/Paper/Purpur or Forge/Fabric)
- The ability to add an additional port
- The same plugin/mod version installed both on the server and on each player's client
Voice Chat requires a dedicated port. If you cannot create an additional port, the plugin will not work properly.
Plugin Installation
Choosing a Plugin
You have two main solutions to choose from:
- Simple Voice Chat — simpler configuration, lighter, ideal for small and medium servers
- Plasmo Voice — more advanced features, better audio codecs, higher sound quality
For most servers, we recommend Simple Voice Chat due to its easier configuration and lower resource consumption.
Downloading the Plugin
Download your chosen plugin version:
- Simple Voice Chat: Modrinth or CurseForge
- Plasmo Voice: Modrinth or CurseForge
Simple Voice Chat requires the same version on both server and client. Make sure all players have exactly the same plugin/mod version installed as the server.
Uploading the File to the Server
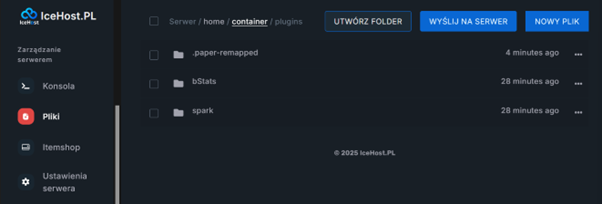
- Go to the Files tab in your server management panel
- Open the plugins folder (for Spigot/Paper) or mods folder (for Forge/Fabric) located in the server's root directory
- Click the "Upload to server" button and upload the downloaded
.jarfile
First Launch
- Start the Minecraft server (or restart it if it's already running)
- The plugin will automatically create a configuration folder and configuration files
- After the first launch, stop the server
Voice Chat Port Configuration
Voice Chat requires an additional port for voice transmission.
Adding a New Port
- Go to the Network tab in your server panel (located on the left side of the navigation bar)
- Add a new port, select Voice Chat Port from the list, then Create new port
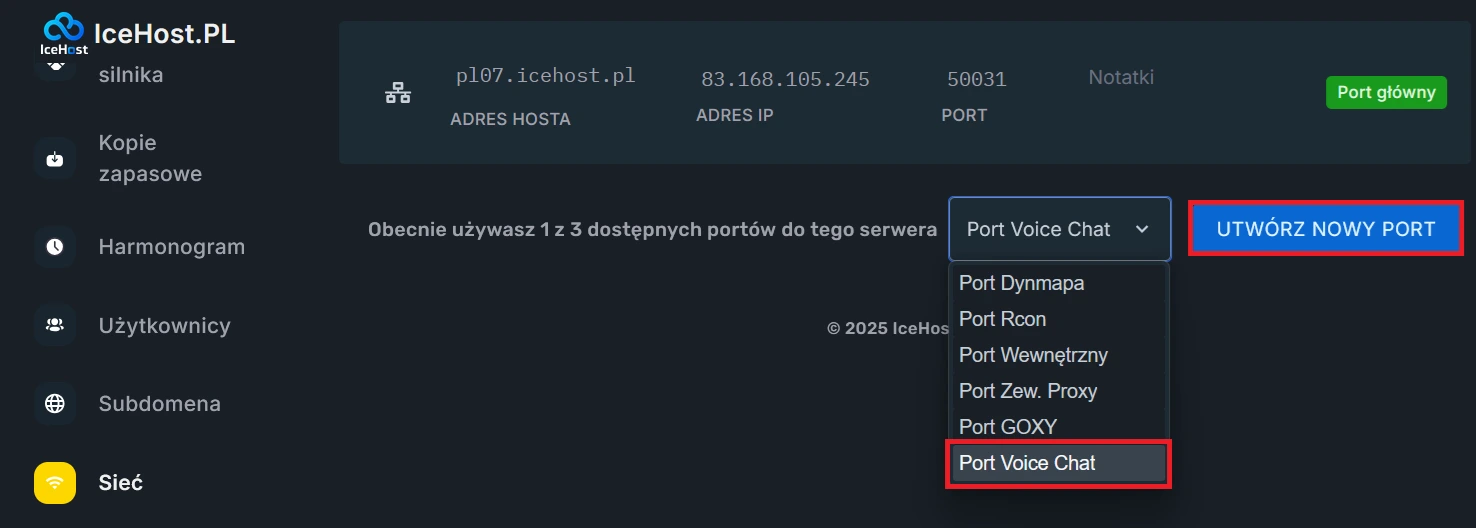
- Copy the assigned port number — you'll need it in the next step (e.g., 44000)

Simple Voice Chat Plugin Configuration
Configuration File Location
The path to the configuration file depends on your server platform:
- Spigot/Paper/Purpur:
plugins/voicechat/voicechat-server.properties - Fabric/Quilt/Forge/NeoForge:
config/voicechat/voicechat-server.properties
Editing the Configuration File
- Go back to the Files tab
- Navigate to the appropriate folder (see: location above)
- Open the voicechat-server.properties file
Key Settings
1. Voice Chat Server Port
Find the line with the port= parameter (default is set to 24454) and change the value to the port number created earlier in the "Network" tab:
port=44000
2. Saving Changes
After making all changes:
- Save the
voicechat-server.propertiesfile - Restart the server in the Console tab
After the restart, a message will appear in the console informing you that Simple Voice Chat has started on the selected port.

Plasmo Voice Plugin Configuration
Configuration File Location
The path to the configuration file depends on your server platform:
- Spigot/Paper/Purpur:
plugins/PlasmoVoice/config.toml - Fabric/Quilt/Forge/NeoForge:
config/plasmovoice/config.toml
Editing the Configuration File
- Go back to the Files tab
- Navigate to the appropriate folder (see: location above)
- Open the config.toml file
Key Settings
1. Voice Chat Server Port
Find the [host] section and the line with the port = parameter (default is set to 0) and change the value to the port number created earlier:
[host]
ip = "0.0.0.0"
port = 44000
2. Saving Changes
After making all changes:
- Save the
config.tomlfile - Restart the server in the Console tab
After the restart, a message will appear in the console informing you that Plasmo Voice has started correctly on the selected port.

Useful Commands
Simple Voice Chat
Basic Commands
/voicechat test— tests the connection to the Voice Chat server/voicechat info— displays Voice Chat configuration information
Visibility Management
/voicechat hide— hides you in Voice Chat (others cannot hear you)/voicechat show— shows you again in Voice Chat
Administrative Commands
/voicechat mute <player>— mutes a specific player for everyone/voicechat unmute <player>— unmutes a player
Plasmo Voice
Basic Commands
/vmusic— enables/disables background music (if available)/plasmo— opens the main configuration menu
Administrative Commands
/plasmo reload— reloads the configuration without restarting the server/plasmo mute <player>— mutes a specific player